

(photo by Loop on Etsy)
Hi, Knitters,
Quite a few months back I spun up a gorgeous Loop Bullseye Bump called Salty. When you spin one of these bumps, you simply pull from the middle and the colors flow from one to the next. Salty went from light gray to lime to neon green to dark olive to olive green. This bump is such a great combination of colors.

The singles.

The Navajo plied singles in action.

The finished yarn washed and dried!

I got 242 beautiful yards of a worsted weight. The hardest thing about finishing one of these gradient handspun skeins is figuring out what to do with it. Gradients don't work for every pattern. I let it sit for awhile and I thought about it. I have knit with my handpun a lot, shawls, socks, mittens, scarves, fingerless mitts, hats, toys, etc. I've done it all.... all but a sweater.
Click here to see the shawl I knit with another Loop bump! It's prettier than I even remember. I gave this shawl to my sister.

Obviously, 242 yards isn't going to be enough for a sweater so I started looking for something to combine the handspun skein with. I looked through my stash and fell upon a large amount of black Cascade 220 that I've had for probably over 10 years at this point. I'm not even sure why I have this black yarn or if I bought it or if it was given to me. I realized that the black would set off every color in the gradient Loop yarn and set it off nicely.

I wound up the handspun skein and the black wool, too. Gradients always look so cool when you wind them up. I love that.
My next task was trying to find a pattern. I didn't want to make up my own so I started searching through Ravelry. I had purchased the Bonne Marie Burns Basic Chic Hoodie awhile back and I started thinking this was the perfect choice to incorporate my handspun.
Click here for the Basic Chic Hoodie pattern on Ravelry! (Don't buy it yet! You'll see why at the end.)
I love everything about this very simple, basic pattern. It gave me all of the numbers I needed to get started and since it is such a well-written and straight-forward pattern I could easily change a few things to get exactly what I wanted in my version of the hoodie.
This raglan hoodie pattern is so good and pretty (there is a lace panel option included in the pattern, too!). You could just knit straight from the pattern and get a gorgeous garment but I wanted to change a few things to make it my own. I made the smallest size.
Here is a list of the things I changed:
- worked at a slightly different gauge (smaller)
- added waist shaping
- changed the number of sts cast on under the sleeves (fewer)
- changed the sleeve decreases (did a rapid decrease right away to get rid of extra fabric under the arms and then continued on a bit differently than the pattern suggests)
- changed the length of the body and sleeves
- changed the buttonhole number
- picked up a different number of stitches for the button bands and hood edging
- used kitchener stitch to close up the top seam of the hood to give a smoother finish (instead of 3-needle bind-off)
- added the stripes!
I love the little pockets with buttons on the ribbing at the bottom edge of the body. That is genius.
So here is the making of the Salty Hoodie!

I wanted to start with the gray stripes at the top toward my face as olive green is not a good color for me but gray is fine. I didn't have any kind of a plan for the striping so I just did the stripes however it came to me at the time.
By the way, that's my new Jennie the Potter little red bicycle mug! It even has a basket and a tree on the other side. It is a bit smaller than my original sheep mug and I like the size even better. She's my fave. Click here for Jennie's Etsy shop!

My family took a car trip out to Colorado earlier in August so this is where I got most of the body done. I added the pockets at the top of the ribbing with the buttonholes. I had ordered custom black wooden buttons at SSK from Deerfield Creations and I was excited to use as many as I could on the hoodie.

One sleeve in the bag!

Second sleeve almost finished!
As far as the sleeves go, I had a vision of them looking like I was wearing a fitted long-sleeve black t-shirt under the stripey short sleeve cardi. Since the striping went down over the shoulder at the top of the arm I thought this could really work. If you look at the photos of the original pattern you can see that there is a much more relaxed sleeve, especially at the underarm so I made an effort to tighten this area up. I cast on fewer stitches under the arm when you separate the sleeves from the body stitches. Then as I picked up the arm stitches to work down on the sleeve I immediately got rid of more of the extra fabric by rapidly decreasing more of the underarm stitches. I learned this trick from Wendy Bernard (the queen of the top-down sweater).
It worked perfectly!

Above I have now added the hood, finished the sleeve and have finished the button bands and hood edging. The stitch markers hanging there are letting me know where I placed the buttonholes and where the buttons should go to match up.

Unblocked but still beautiful!
As I worked down the body I decided to switch out the striping around the top of the waist so that the handspun became the focal point, not the black Cascade 220. It was a smart move. The colors show up beautifully and it is cool how the gradient nature of the handspun shines through. I used almost every last bit of the 242 yards. I just have a teeny-tiny bit of a ball of the handspun remaining.
Blocking the day away! It took forever to dry.

As the cardi was blocking I received my custom black wood-turned buttons from Deerfield Creations. I don't know what it is exactly but I am in love with these buttons! They are so perfect and smooth and just beautiful. I can't believe Lori (whom I met and ordered from at SSK -- she's adorable to boot!) made these buttons. How does she do it? That is some kind of magic. I even love the card she stitched the buttons on for presentation. I saved it. I purchased a couple of other things from her as well at SSK and I'll share with you at a later date.
Click here for Lori's Deerfield Creations Etsy shop!

As soon as my cardigan was dry I started stitching on my Deerfield Creations buttons. I couldn't wait!

I stitched and sewed and tied off the 10 buttons like a fiend......

..... only to see this after I took this photo and posted it to Instagram. Do you see it?
The stripes are not lining up by about 2 or 3 rows! I'm no perfectionist but this had to be fixed.

I snipped those stinkers right off and started again!

I got it right this time around. Yay! Those stripes are perfect.

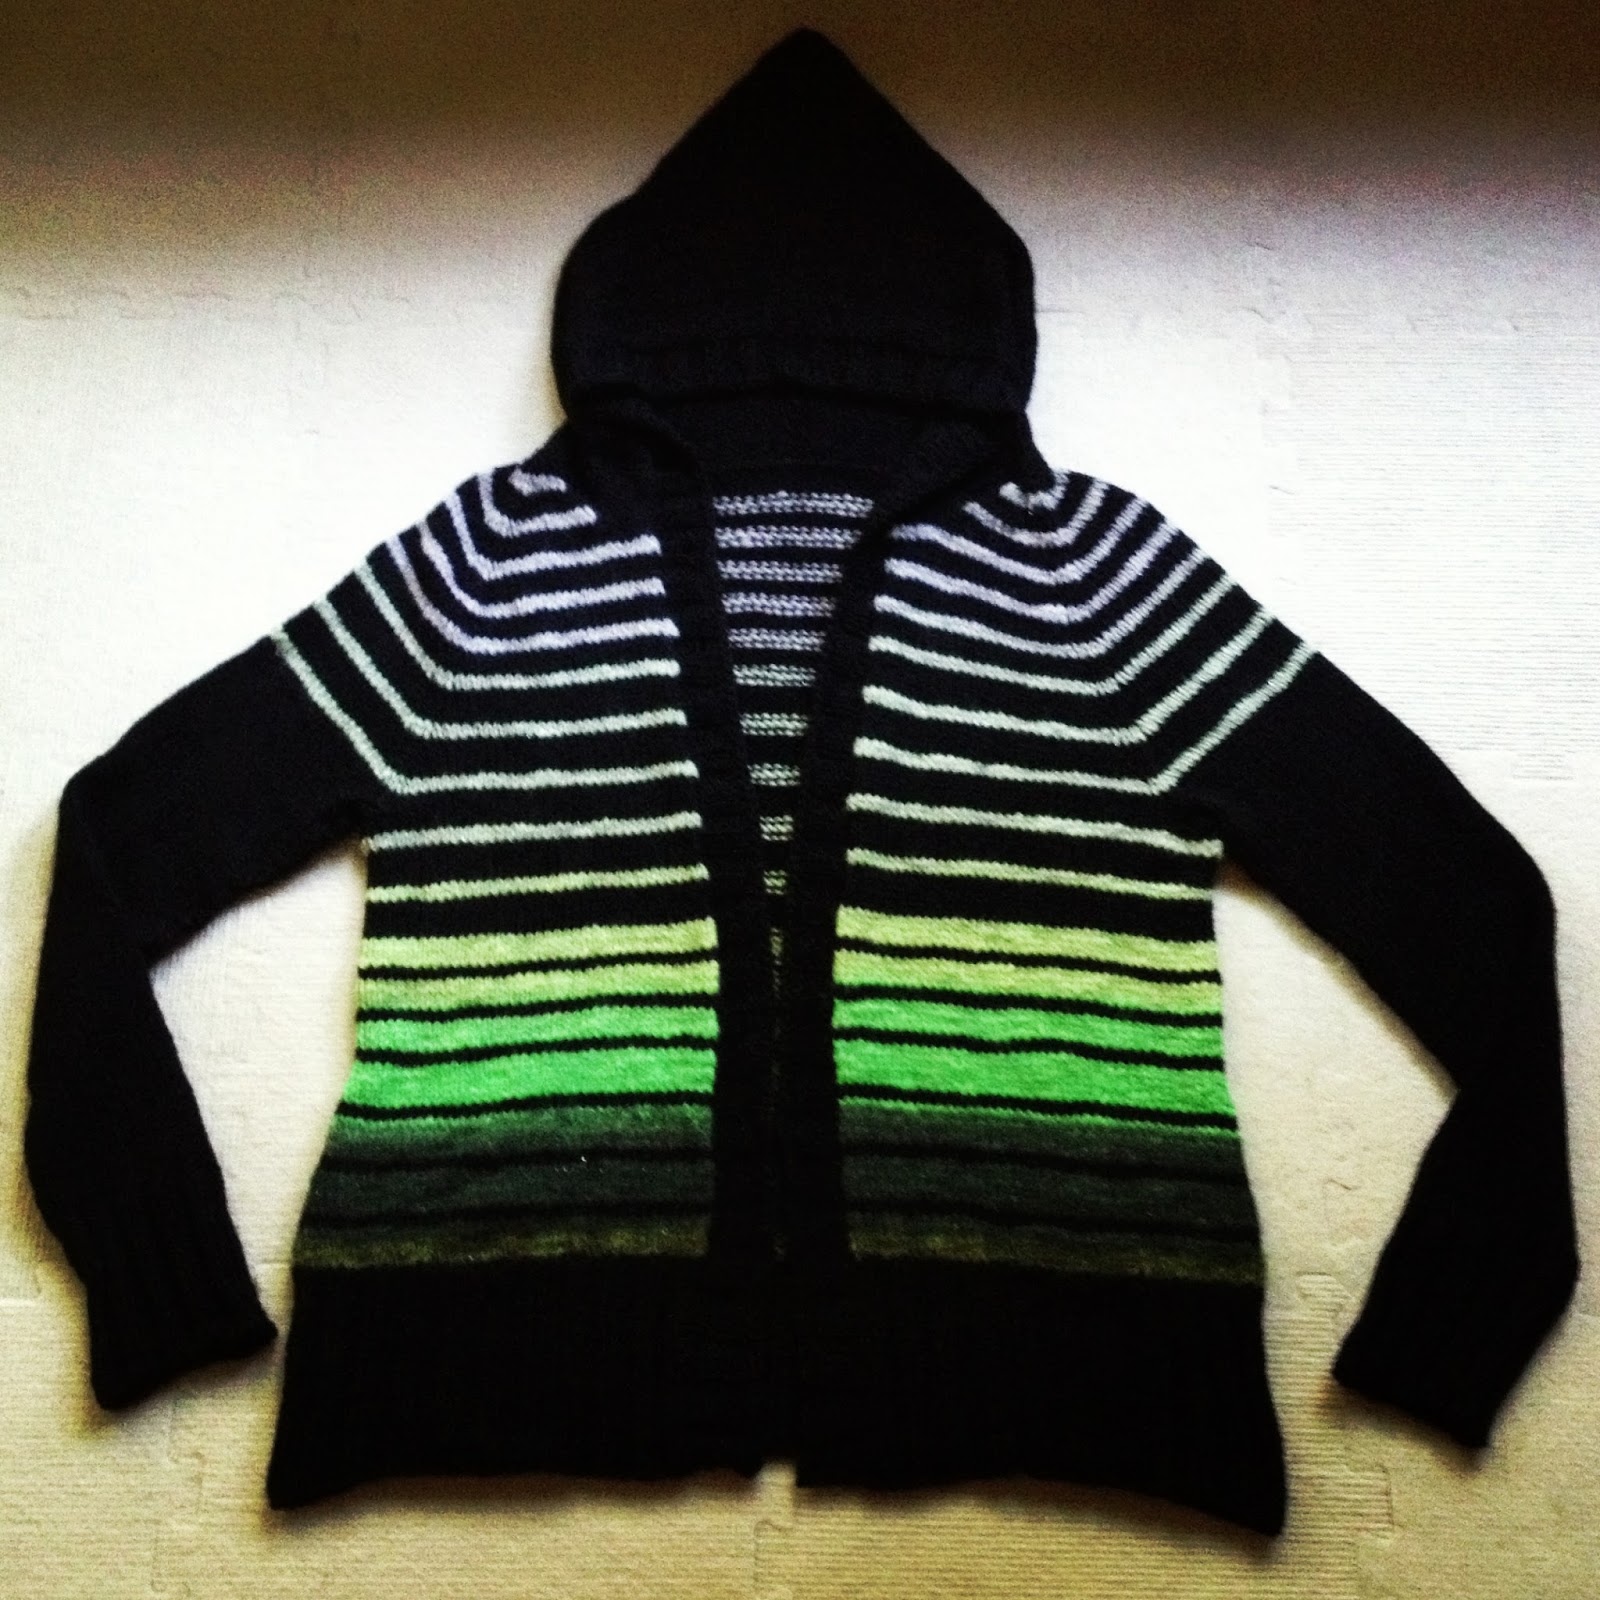
Here is the final cardigan as it stands. I love the fit, the feel, the use of the handpun, the hood, the fitted body and sleeves, the little pockets with buttons, and the gorgeous hand-crafted buttons, and most of all the lined up stripes (ha!).
I highly recommend Bonne Marie Burns pattern for the Basic Chic Hoodie. You could knit it as is or use it as a spring-board for making up your own creation. This is the perfect pattern for customizing. I must have mentioned somewhere that I used this pattern because Bonne Marie contacted me and has offered you a fantastic deal on her pattern!

It looks just as good from the back. Hooray!
Bonne Marie is offering you a 20% off discount code when purchasing her pattern over the next week!! I am letting her know that I posted this today, August 29th, 2013, and the discount will be available through next Thursday, Sept. 5th! Thank you, Bonne Marie.
The discount code is: stripes
Click here for the link for the Basic Chic Hoodie! (You don't have to belong to Ravelry to purchase here.) Enter in the discount code at the time of purchase. I highly recommend this pattern and it is one that everyone should own!
Click here to see all of Bonne Marie Burns patterns on Ravelry! She is a wonderful designer and pattern writer and after enjoying the Basic Chic Hoodie so much I think I will be knitting more of her patterns. Thank you, Bonne Marie for the discount code for my readers and for your beautiful work.
I'll be back soon with more finished projects to share.
best, susie