Thursday, February 09, 2012

How I Make My Socks


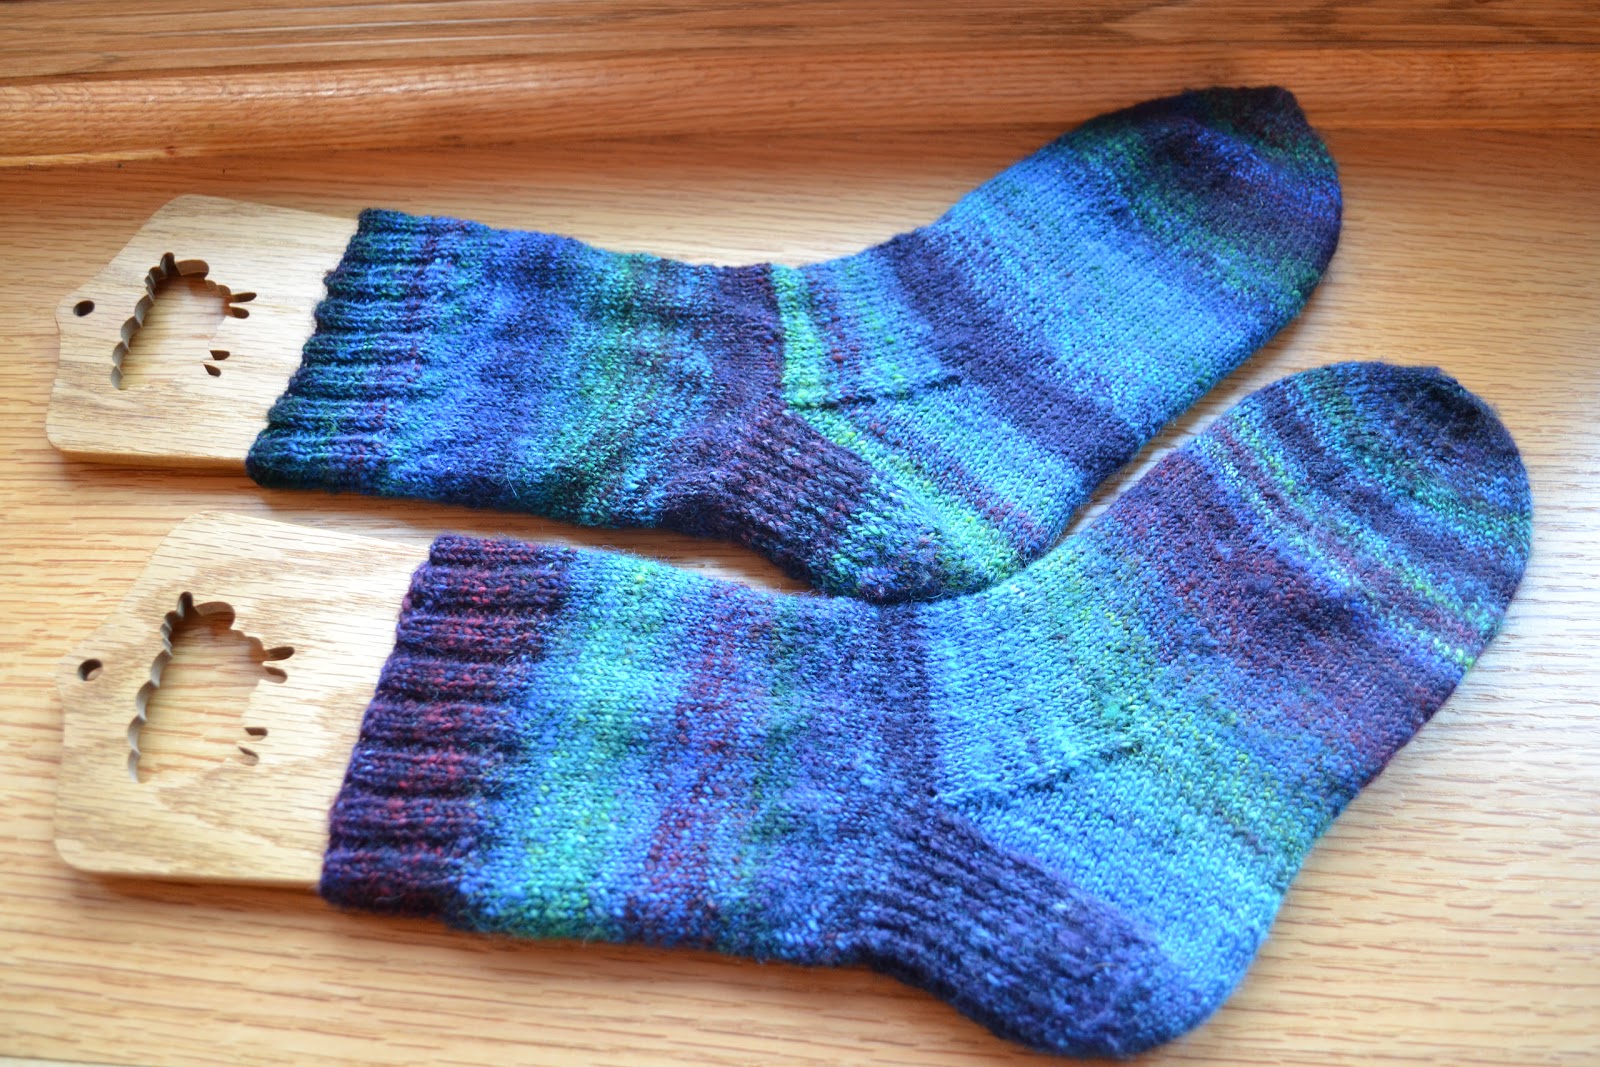
(photo ~ my handspun fingering weight yarn from Dyeabolical superwash wool roving, sock blockers from The Loopy Ewe)

Hi Knitters,
Oh my goodness, you all make me smile and laugh. Last I looked there were well over 30 comments on the Super Sock Update post. Well, if you double that number that's about how many emails I have received asking specific questions about my socks. I have to smile again because while I am writing this I am getting more emails popping up with questions about socks.

Anyway, instead of trying to respond individually to dozens of emails I am writing this post packed full with information about the stockinette stitch socks I always have on my needles. I always use double-pointed needles (dpns), too, I don't magic loop or two at a time, I do plain and simple dpns only!

If you want information about other techniques like magic loop or other circular needle techniques you will have to go elsewhere to find it, like youtube or do a google search or look for some good books.

Here it goes! Also, because I know I will get asked, I am not making a pdf for How I Make My Socks. Feel free to copy and paste the text from this blog post in your word program and make a pdf or simply print it out from there if you'd like. This is just a simple write up of my version of stockinette socks.

I put this up in Ravelry if you want to favorite it there. Click here for the Ravelry project page for How I Make My Socks.

How I Make My Socks
Written by, Susan B. Anderson

Materials:
Sock/fingering weight yarn
US size 1 double-pointed needles (set of 4)
Yarn needle
Scissors
Tape measure or ruler

Gauge:
I don't worry much about this although I don't recommend not worrying about it. I simply use fingering or sock weight yarn and US size 1 dpns. My gauge varies between 7-8 stitches per inch in stockinette depending on the yarn I use.

Cuff:
Cast on 64 stitches. I use a long-tail cast on (click here for my video tutorial on this cast on). Join to work in the round.
Rnds 1-12: (k2, p2) repeat to the end of the round.
(Sometimes I forget to stop ribbing and then I have more like 15 or 16 rounds of rib, I just match it on the second sock.)
Continue in stockinette stitch (knit all stitches on every round) for 6 inches. This is my cuff length preference. You can make your cuff shorter or longer as you see fit.


Heel Flap:
Divide the stitches as follows:
Needle 1: 32 sts (Needle 1 becomes the heel flap)
Needles 2 and 3: 16 sts each
Work back and forth only on Needle 1 for the heel flap.
Row 1: (slip 1 stitch as if to purl, k1) repeat to the end of Needle 1
Row 2: slip 1 stitch as if to purl, purl to the end of Needle 1
Repeat rows 1 and 2, fifteen more times (16 times total). If you count you will have 16 columns of slipped stitches on your heel flap.
Repeat Row 1 one more time.

Turn the Heel:
abbreviations:
p2tog - purl 2 stitches together
k2tog - knit 2 stitches together

Now, continue to work back and forth on Needle 1 only. You’ve just completed a right side row. Turn and work back on a wrong side row as follows:
Row 1: slip 1 stitch as if to purl, purl 17 stitches, p2tog, purl 1 stitch, turn to go work back in the other direction.
Row 2: slip 1 stitch as if to purl, knit 5 stitches, k2tog, knit 1 stitch, turn to work back in the other direction.
Row 3:  slip 1 stitch as if to purl, purl to 1 stitch before the gap (look and you’ll see the gap where you turned on the row before), p2tog, p1, turn to work back in the other direction.
Row 4: slip 1 stitch as if to purl, knit to 1 stitch before the gap, k2tog, k1, turn to work back in the other direction.
Repeat rows 3 and 4 until all of the stitches have been worked. Your last row should be a row 4 so you are at the end of a knit row. On the last 2 rows you work, you will end the rows with a p2tog and a k2tog.
You will have 18 stitches remaining on Needle 1.

Gusset:
First:
Continue on with the working yarn to pick up stitches going down the side of the heel flap using the free dpn to pick up the stitches.
Pick up 16 stitches, (pick up one stitch in each of the slipped stitches).

Second:
Now place all of the stitches on Needle 3 onto Needle 2. Needle 2 now has 32 stitches. Knit across Needle 2, which is now the top of the foot on your sock.

Third:
Continue on with the working yarn to pick up 16 stitches going up the other side of the heel flap, picking up 1 stitch in each of the slipped stitches. This is Needle 3.

Fourth:
Continue working onto the same needle (Needle 3) and knit 9 stitches from the heel turn. Place the remaining 9 stitches onto what is now Needle 1.

New stitch count:
Needle 1: 25 stitches
Needle 2: 32 stitches
Needle 3: 25 stitches

Decrease rounds for the gusset:
Rnd 1:
knit all stitches
Rnd 2:
Needle 1: knit to the last 3 stitches, k2tog, knit 1 stitch
Needle 2: knit
Needle 3: knit 1 stitch, ssk, knit to the end of the needle
abbreviation:
ssk – slip 2 stitches separately as if to knit, knit the slipped stitches together through the back loops

Repeat rounds 1 and 2 until there are 16 stitches on each of Needles 1 and 3, and 32 stitches still remain on Needle 2.

Foot:
Knit every round until the foot measures (from the back of the heel to the stitches on the needles) 2-inches shorter than your desired total foot length. 
For example, my foot measures 9 1/2 inches from the back of my heel to the end of my toes. I work my foot to 7 1/2 inches before I start the toe decreases. My shoe size is a US women's 7.5, I wear a 38 in Birkenstocks. I have a 9-inch foot circumference at the ball of my foot.

Toe:
Rnd 1: knit all stitches
Rnd 2:
Needle 1: knit to the last 3 stitches, k2tog, knit 1 stitch
Needle 2: knit 1 stitch, ssk, knit to the last 3 stitches, k2tog, knit 1 stitch
Needle 3: k1, ssk, knit to the end of the needle
Repeat rounds 1 and 2 until you have 6 stitches remaining on Needles 1 and 3, and 12 stitches on Needle 2.
Now knit the 6 stitches from Needle 1 onto Needle 3. You now have 2 needles with 12 stitches each.
Cut the yarn leaving a 10 inch end. Place the end on a yarn needle. Use the Kitchener stitch to close the toe. 

I have an instructional video tutorial on the Kitchener stitch to close the end of a toe. Click here for the video.

There you have it! I am not going to individually respond to email questions and instead I am offering this post of sock-filled information.

I have had a few people ask about the cuff falling down while wearing the socks. I don't have this problem but my suggestions would be to either decrease the number of stitches for the ribbed section of the cuff (make it a multiple of 4 if using a k2, p2 rib) or decrease the size needle you are using to work the ribbed section of the cuff (or do both a smaller number of stitches and a smaller needle size) in order to achieve a more customized fit.

Added later: By chance I happened upon this today to help with cuffs staying up! Click here.


Here are the books I constantly recommend to people for basic sock instruction and know-how:
Knitting Rules  - Stephanie Pearl McPhee (pg. 131) - a sketchy recipe for socks that I really enjoy and a generally great book on knitting!
Getting Started Knitting Socks - Ann Budd - The best ever and most informative sock knitting basics book, extremely thorough, lots of options, etc. Highly recommend!!!
The Knitter's Handy Book of Patterns - Ann Budd - This book contains a basic stockinette stitch sock with heel flap and gusset in 5 different gauges. You'll have everything at your fingertips for this same type of sock starting on page 48. Plus, this book is a must have for basic patterns of all sorts!

Also, there is a great little tutorial by Mary Jane Mucklestone (click here) on how to sew up holes like the ones you might get when picking up stitches on the sides of the gussets. She is using mittens as her example but it could be used for socks as well. There are lots of tips and tricks available about different techniques to close up these holes so you might want to do a search for those.

Enjoy! I hope I have answered all of your questions.
best, susie

Tuesday, February 07, 2012

Super Sock Update


Hi Knitters,
I adore handknit stockinette stitch socks. There isn't much better when it comes to knitting projects and usefulness. My girls also adore handknit stockinette stitch socks. In fact, I have an entire dresser drawer designated for handknit socks only. My girls have found my drawer of handknit treasures and they have been making it their own this past fall and winter. I don't mind sharing but honestly, I really need to make more socks. Instead of making socks for my feet only I am now providing socks for all three of us. I can't blame them for enjoying handknit socks, they are simply the best.

With this in mind, I have been working on lots and lots of socks lately. I like having several (or more) socks on the needles at the same time. I keep them in small project bags (click here for my favorite bags) that are always loaded up with a small scissors, a tape measure, and a yarn needle. I love knitting socks because that's all you need and you are set for hours of fun. The project is small and portable and easy! But you probably already know all of that so let's get on to my current sock rundown.

Above is the the hard-to-get Watermelon Striping yarn from Freshisle Fibers being worked on Signature Needles dpns in US size 1. This first sock of the pair has been to several swim meets with me. The yarn is a single ply and it is a heavy fingering weight so it is not an easy knit on the US size 1 needles but I am determined to make the fabric as dense as possible so they will last longer.


I haven't made much progress on the Unisono sock I shared last week. I've just started a bit of the heel flap. The needles are Knit Picks dpns in US size 3.


This is the second sock for my beloved new pair of Opal socks. I bought the yarn here. I am knitting these socks on US size 1 dpns from Knit Picks. I have turned the heel and I am decreasing for the gusset. I will have this one finished in no time. This sock came with me to the swim meet last weekend where I made great progress.


This is the second sock of the Candy Corn Vesper Self-Striping sock yarn. I love these and they came to Vogue Knitting Live with me last fall. After Halloween came and went I kind of set these aside to work on other socks. I will get them done for next fall for sure!

The needles are Blackthorn US size 1 dpns. The needles are really unusual and I like them. They are not as slick as metal but they are very sharp which I love.


An assortment of sock knitting is always a good thing. If you have lots of choices going you always have something that will strike your fancy at any moment.

Are you knitting socks right now? I'd love to hear about it!


As a quick side note, TC finished another hat just the other day. She is obsessed with the Crystal Palace Mochi yarn series. She has knit hats and booties from all of the weights of the Mochi yarn. This particular hat is made out of the Chunky Mochi yarn on US size 9 needles. TC is donating this hat to a local knitting group that donates baby hats and blankets to various organizations throughout the year. I think they are meeting this weekend so she is excited to have something to donate when she goes off to knit.

The pattern for this single skein hat for the Chunky Mochi yarn is available by clicking here and is called the Chunky Mochi Baby Hat. TC actually designed this hat and I wrote up the pattern for her. It is an adorable quick knit that would be an excellent baby gift.

Okay, Knitters, I'm off to knit, knit, knit! I have so many projects going for books and other pattern stuff. There is never enough time in the day. I hope you are all doing well.
best, susie
Saturday, February 04, 2012

The Effortless Cardigan


Hi Knitters,
Here is a little (but kind of big) cardigan I finished up late last fall. For some reason I haven't shared it with you yet. 

For those interested, here is some general information about it:
Size: Medium (will discuss this more later in the post), 38.5 inch bust
Needles: US size 9
Yarn: Miss Babs Yowza-Whatta Skein! in the Black Watch colorway (purchased at the Kentucky Sheep and Fiber Festival last May 2011)


This is the first time I've used Miss Babs yarn after hearing about it for years. Well, my conclusion is that it is fantastic. Yowza skeins are gigantic at 560 yards per skein (love that) and suggests a 4-5 stitches per inch gauge on US 6-8 needles. It is 100% superwash merino and knits up as light as air. I really enjoyed working with this yarn and I love the colorway, so much depth.

Miss Babs helped me match the skeins at the Kentucky Sheep and Fiber Festival, inside a hot and steamy tent, by holding them under a light. She did a great job because they were a perfect match. She was wonderful and very helpful. I purchased 3 hanks of the Yowza and I have a lot leftover so I will be working something up with the rest of this gorgeous yarn. It's too good to leave sitting on a shelf.


I love Hannah Fettig. I've reviewed her work, written about her, hosted giveaways for her and generally gushed about her in the past. Click here for her fun blog! She is as clever and cute as they get. Hannah is the queen of creating drape in knit fabric and for her modern and very wearable designs. Her designs are usually with clean, simple lines which makes them perfect for longevity and practicality.

The Effortless Cardigan has an unusual structure. It is a top-down seamless cardigan that continues to increase out in the front to create the long draping front pieces. I love this feature. The cardigan requires a lot of knitting and a lot of stockinette. The knitting goes fast as you are working on a large needle for the yarn (a US size 9 for a worsted weight). This is a signature design move for Hannah as working on a bigger gauge than usual for the yarn is how she creates the drapey fabrics in many of her garments.


I wasn't kidding when I said that this is a lot of knitting for a cardigan. This is my Effortless cardigan stretched out and it looks like a gigantic rectangle basically. Pretty clever stuff by Hannah, and one of the most fantastic patterns around. Hannah is a genius at writing simple, clear patterns. This is an easy, easy knit and really fun, too.

My only regret is that I made it a little too big. If it was more snug-fitting in the shoulders and arms I think it would sit better and wouldn't shift around so much. I feel like I have to adjust the cardigan on my shoulders a lot when I wear it. It pulls forward due to the weight of the fronts making it rise up in the back. That is my error, not anything to do with the pattern. I had a lot of yardage to use up with the Yowza so I went ahead and made it in the medium size, which is a 38.5- inch, I usually make a 36-inch bust sweater/cardigan size.  The next size down was a 34.5-inch bust which would have been much better with only an inch and a half of negative ease which would have held the garment in place better.

I still love the Effortless Cardigan even with the size and wear it all of the time. It is just one cozy, comfy garment.

Next up from Hannah, I am making her Calligraphy Cardigan in madeline tosh dk that I purchased at Nina's in Chicago on a tour trip last spring. I'll share as I go!


I managed to sneak in a tiny bit of spinning . I am making a pretty thick and rustic yarn out of the Dyeabolical mini-batts. Here is the first half of my singles. I am hoping to make a fun hat out of the yarn when it is done. The colors are so spring-like and refreshing. The batt is a firestar, wool and silk blend.

I joined a knitalong for mittens. Click here to see more and possibly join, too!

I started listening to and enjoyed a new podcast this week, Knitting Brooklyn, on the recommendation of the lovely Miss Paula (Knitting Pipeline). Click here to find out about Knitting Brooklyn.

Well, I am off to one busy, busy weekend with my family! Have a good weekend, Knitters, and I know you are all busy as well. I'd love to hear about what you are up to.
best, susie

Thursday, February 02, 2012

Unisono is in the House


Hi Knitters,
I just had to quickly share this good looking yarn cake with you. I started that sock last night with the Unisono yarn. It is a sport weight yarn and I am using US size 3 (3.25mm) dpns. I love how it is making bold stripes with flecks of brown. The colors are such an interesting combination, kind of unexpected.

I bought the yarn at Spin of Door County last summer. It only has 300 meters so I am unsure of how far that will take me. I made a slightly shorter cuff then usual just to be on the safe side.

Boy does a sport weight sock ever work up fast. I need to do more of this. Cast on 48 stitches and go!

Until tomorrow...
best, susie

Tuesday, January 31, 2012

Milk Cow Pattern is Now Available!


Hi Knitters,
This is just a quick post to let you know I have now put the pattern for the Milk Cow in my Ravelry Pattern Shop!

Click here for the Ravelry project page for the Milk Cow pattern!


The pattern was originally published in Knit Circus Holiday Gifts Issue 2011 and now the rights have reverted back to me so I am able to sell the pattern to you.

This cow is adorable and comes with an udder option. I think it is funny that I designed another cow and I got complaints that there wasn't an udder. This time I made sure to include all parts.


Milk Cow is available only in my Ravelry Pattern Store and the price is $4.50! Click on the button if you are interested in finding out more:


That's it for today. I will be back to share a sweater project I finished awhile ago but never shared. It is a fun one.
best, susie

Sunday, January 29, 2012

A Sunday Sort of Thing


Hi Knitters,
First off, thank you for the Another Flower Headband love! I can't believe how many patterns I have sold already in a couple of days. I debated even publishing the pattern and I am so glad I did and that  people are enjoying it.

Today is a lazy kind of Sunday and I just walked around and took a few shots of what's going on around my house as far as crafts go.

Above is a fun toy I am working on for my upcoming book. I have been knitting up a storm lately and honestly, I am having more fun than ever.


I have made good progress on the shawl design I am working on but this project has taken a backseat for the moment. I can't wait to wear it so I want to finish soon. The yarn is Madeline Tosh Pashmina. The feel of the fabric is divine. I can't wait to block this one out to get the full effect. It is a very simple half-circle shawl that is fun to knit.


I take pottery pieces from around my house to set my yarn cakes in and on as I work. It doesn't have to be a yarn bowl specifically to hold the yarn and keep it clean. I have all kinds of pottery pieces that I've collected through the years and it is a fun way to use and enjoy them. The yarn above is Quince & Co. Lark in Glacier. Isn't it pretty?


A couple of years ago I ordered two embroidered pillow kits from Kristin Nicholas. Click here for her shop! I don't know if she is still selling these kits. They are so much fun and I miss my stitching! I am definitely doing more stitching in this year ahead.


Here is the first pillow I finished some time ago. It is a family favorite and has held up quite well. The two pillows will look so cute together. Can't wait to finish this one, too.


Lastly, this gorgeous fiber is sitting on my window seat. I haven't been spinning much due to a lack of time. I am eyeing these batts as my next spinning adventure. They are from one of my faves, Dyeabolical. These particular batts (there are 3 in the package) are 4.19 ounces total and the content is wool, tussah silk, bamboo and firestar (which is the shiny stuff). I am up for a new adventure! Maybe later today I will squeeze in a little spinning time.

I'll keep you posted on my progress on all of these Sunday projects.

Thank you all for joining me on this spot and through subscription emails and blog readers, etc. I have been overwhelmed lately by the kindness and generosity of the fine group of knitters gathering here. My blog stats and pattern sales have been way up lately and I simply want to express my appreciation and gratitude to you all.

Happy Sunday!
best,
susie

Thursday, January 26, 2012

Another Flower Headband - New Pattern


Hi Knitters,
Well, after years of seeing these adorable flower headbands all over the place and having my daughters request that I a make them one, I finally sat down and designed one myself. It is not an earthshaking design and I didn't reinvent the wheel, but I did try to spice up my version with some fun techniques that may be new to some of you (if not that's all the better). I threw in some detailed instructions for short rows and a sewn bind off and a few different sizes for the headband and a completely customizable flower.

There you have it! My girls are in love with these headbands. Peachy likes the natural version and TC likes the colorful Noro version. Go figure.

Here is what you will need:
120 yards of chunky weight yarn (samples in Rowan British Sheep Breeds - leftover from the Owls sweater, and Noro Kochoran)
US size 10 needles, 6mm, 16-inch circular and 24-inch circular (the longer needles are optional but make things easier) or the size to obtain gauge
Gauge is 3.75 stitches per inch in stockinette stitch.

And you'll need about one afternoon or evening to make a beautiful headband! It is a fast and furious and simple project.


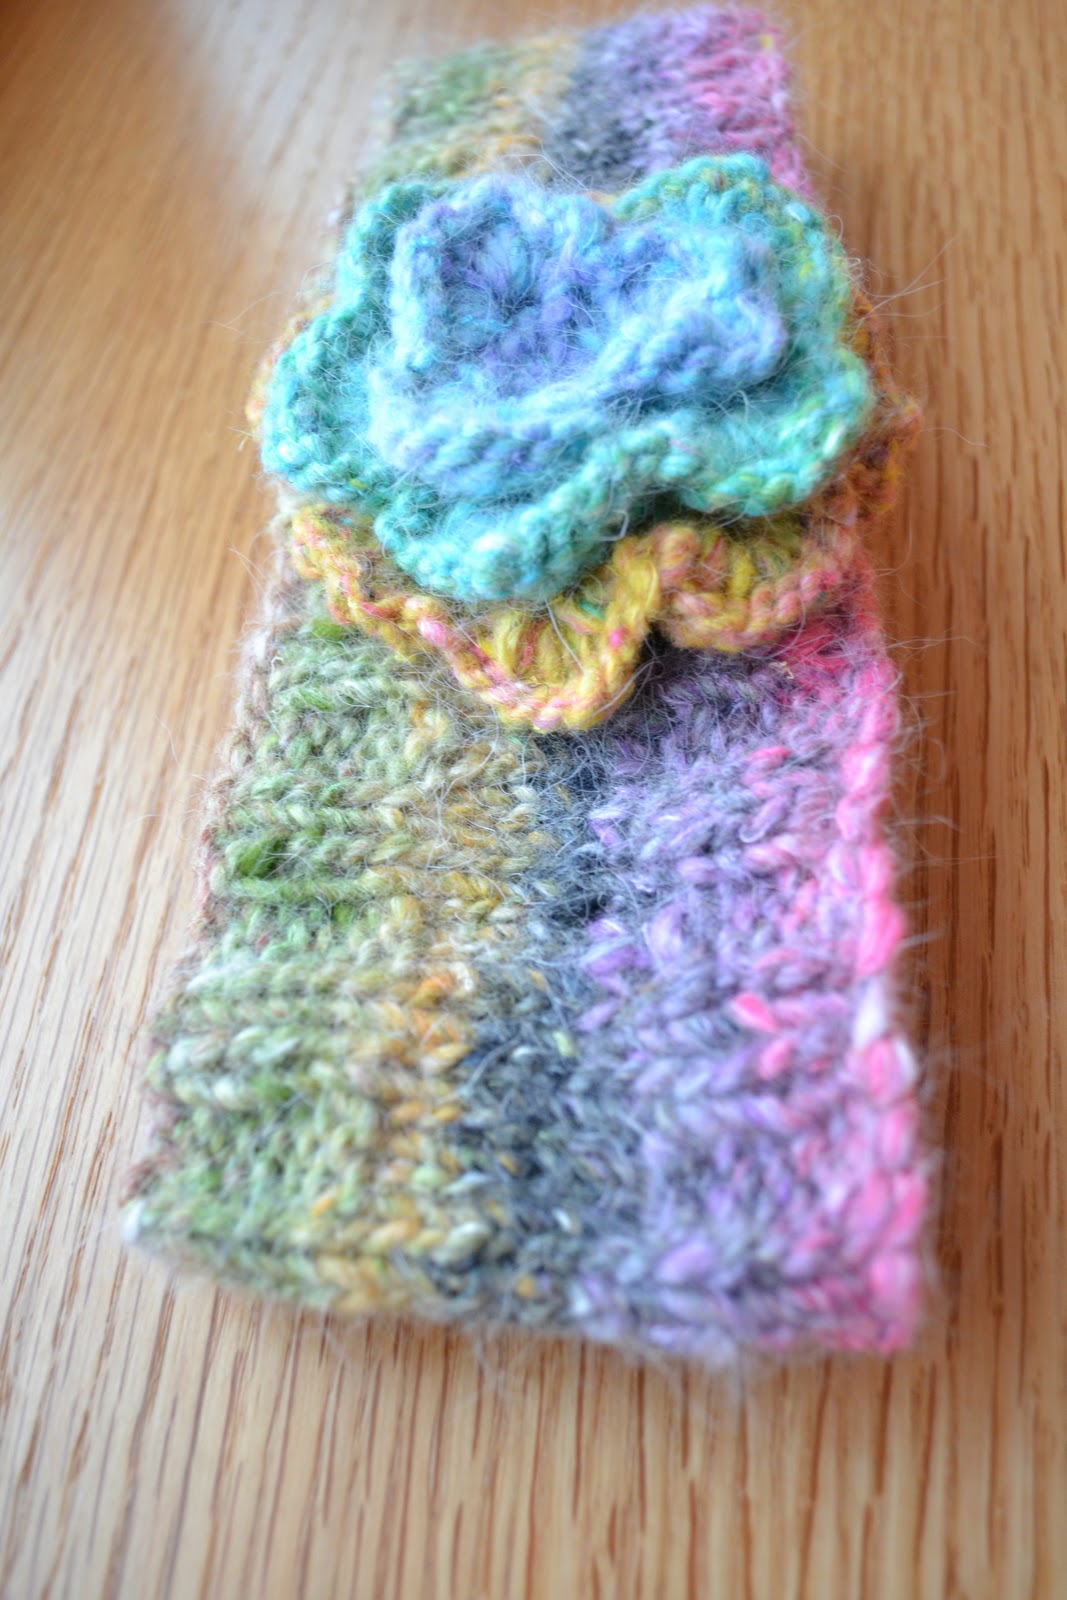
A little front angle for you....


The Noro Kochoran version...


TC wanted a lining for extra warmth so I found a headband that I purchased at Jo Ann's for $1.00 in a matching shade of pink. I see these cheap-o headbands all over, even in drugstores and grocery stores. I took a matching thread and stitched it in leaving enough give so that it stretches nicely.

One note, TC wanted a bigger flower so I added a 10 petal layer to her finished version. This version has a smaller flower.

Go big or go home (with your flower that is).


Now, I want you to know that there are pages of similar projects on Ravelry like this one. There are even many free versions of headbands with flowers. You may want to check these out.

I am making this pattern available for an extra-low price of $2.50.

And for this price you get:
3 sizes:  small child (large child, teen/adult); 16-inch (18-inch, 20-inch) circumference (remember to have 1-2 inches of negative ease when selecting a size)
Technique instructions
A customizable revamped flower pattern (similar to the felted flower in Itty-Bitty Hats) - it is only 3 rows per petal layer!
An instructional video for the flower - remember this one?

And a whole lot of fun, I hope! I made three of these and had the pattern completely memorized including the flower. It is that simple. It's my new go-to gift.


Click here for the Ravelry project page link!

I forgot how much I love making these flowers!

For some other cool flowers to embellish your headband check out this pattern by Kristin Nicholas.


The button-free headband gets narrower in the back of the neck for comfort. This project is a great way to use up leftovers from other projects. You could stripe yarns and use different yarns for the flower, too. Mix it up!


The pattern is in my Ravelry Pattern Store and I am putting it up in the new Craftsy.com pattern store as well (I'll let you know when it's available over there). Yarn shop owners, by the way, I have made my Ravelry Pattern Shop patterns available for wholesale if you are interested in that. I think you have to be a pre-approved shop but definitely check into it if that is something you'd like to do.

Here is the Ravelry button to click to purchase the pattern for Another Flower Headband, if you are interested:


I'll be back with my Milk Cow pattern from Knit Circus. The rights have reverted back to me so I can sell the pattern in my shop now.

Also, a couple of you left comments about a Pinterest invite but you didn't leave your email. I need your email address to invite you.

Take care, sweet Knitters, and keep those ears warm!
best, susie
Monday, January 23, 2012

And Now....


Hi Knitters,
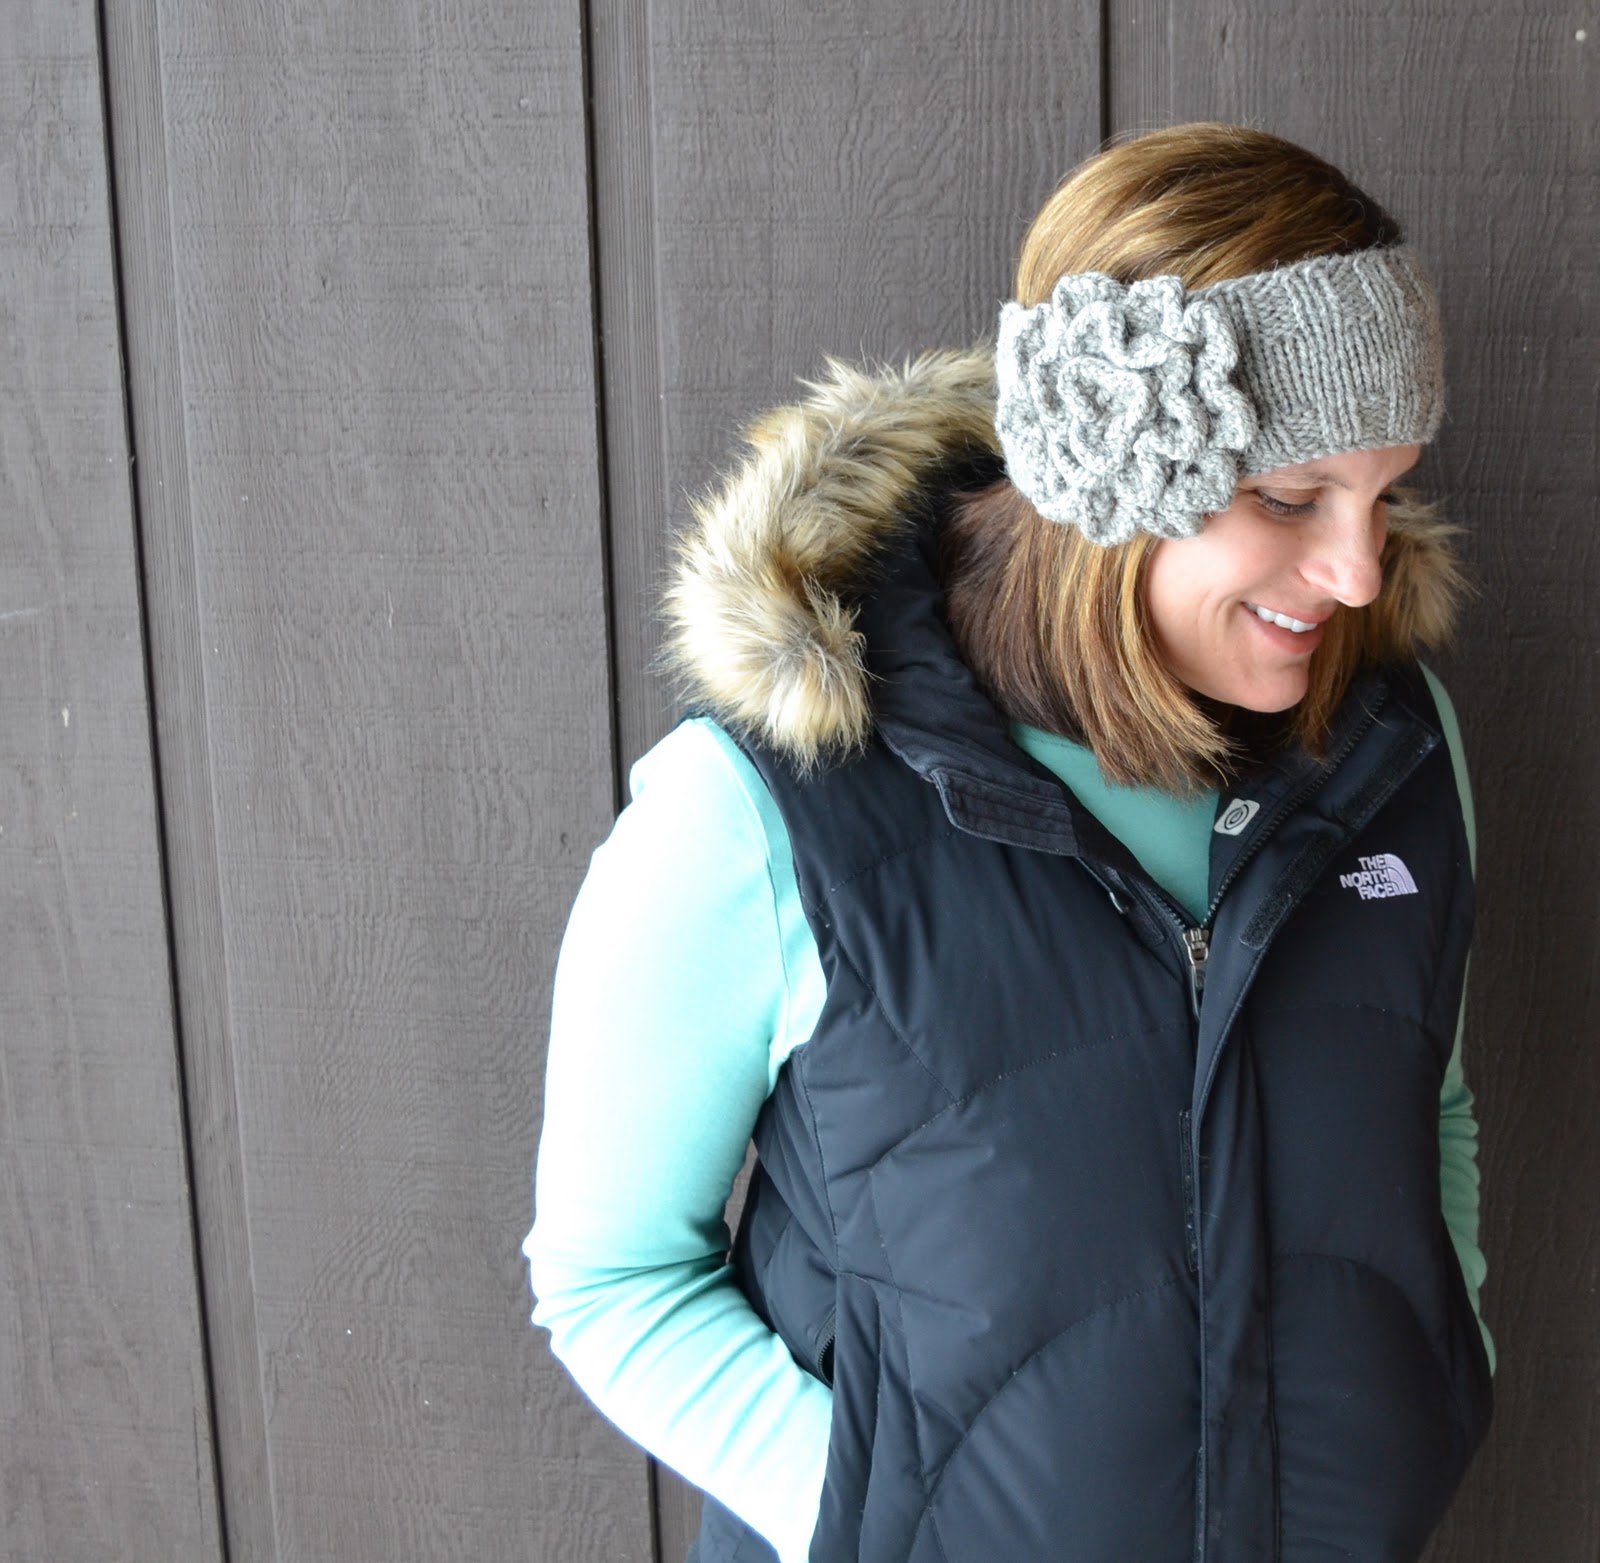
Ahhhhhh.... and now my Owls is even better and much more comfortable and wearable.
Red oval buttons from the Sow's Ear.
Succinct and clear sewing machine steeking instructions from, Color by Kristin, by Kristin Nicholas.
Tiny sentimental antique eye buttons moved discreetly to an owl on the back, had to keep those.
best, susie

Friday, January 20, 2012

One Last Hoot and Link Time


Hi Knitters,
Well, my Owls pullover, designed by Kate Davies, is finally dry and I have been wearing it ever since. It smells so good from the Soak wool wash I used. While it was blocking TC and I were discussing the buttons and she knelt down put her face right in the wool and took a deep sniff. She told me it smelled really good. That made me smile. She's a wool-girl.

The blocking didn't change the appearance much but it softened the fabric a little and it just feels cleaner and fresher. It was much needed.

As promised, here are the details for my version of Owls.

Needles: US size 10 and 10.5, 24-inch circulars and dpns - for the sleeves
The pattern recommends a 32-inch but I didn't have any problem knitting the entire body and yoke on the 24-inch circs.

Size: Size 4 in the pattern (38-inch bust)
Usually I make a 36-inch bust size but Kate describes the sweater as a very fitted pullover and I really didn't want a super tight chunky weight sweater. I wanted to be able to layer underneath. Even though I went up a size, it really did turn out as quite a fitted sweater and I was right on gauge and used the suggested yarn.

Yarn: Rowan Purelife British Sheep Breeds Chunky (100% British wool), 120 yards per skein (I used the better part of 6 skeins.) in the Steel Grey Suffolk colorway

Length of body to underarms: 17.5-inches

Length of arms from underarm to bind off at wrist: 17-inches

There you have it. I followed the pattern as is! If you make an Owls please let me know and I hope you enjoy it as much as I did.

I have to talk for a moment about Pinterest. I am having so much fun over there. I have discovered and tried lots of new recipes, found new sewing patterns and crafty inspiration, learned about new products, and especially enjoyed the huge numbers of knitters on Pinterest.

Click here to check out my boards on Pinterest! Please feel free to follow me if you'd like (you can follow all boards or select the ones you are interested in). I'd love to see you over there.

It is still relatively new as a site so you need an invite to join but then you are a member right away. There is no waiting. If you need an invite let me know and leave your email in a comment on this post. I will happily send you an invite. I am a little busy over the next few days but I will add you as soon as I get a chance.

I'll leave you with a few fun recipe links I've found on Pinterest. I have cooked entire meals from Pinterest links which has been really fun. Check these out:
One Pot Macaroni and Cheese recipe
Yummy no-bake cookies
Crockpot chicken and noodle soup
Snickerdoodle muffins
The bark that changed everything (Watch out, this is addicting and the kids love it!)

Off into the weekend we go! I have a couple of new patterns that will be available for purchase through my Ravelry Pattern Shop next week. I haven't had the time to update my shop much at all so I am looking forward to doing more of that. I am working on the cutest women's winter accessory right now that I am so excited about.

Take care.
best, susie


Tuesday, January 17, 2012

Owls Blocking Day and Button Eyes


Hi Knitters,
Blocking day has come again and this is actually the second day of blocking. The Rowan British Sheep Breeds is a heavy wool and it really soaked up that water yesterday. I put a fan on it yesterday, too, and it is still damp today. Maybe by tomorrow it will be dry. 

I will be wearing it tomorrow if it is ready! I'll share one more photo of me in the finished and blocked and buttoned pullover.

By the way, when I dumped the water out of the basin where I was washing the sweater, the water was quite dirty with a small amount of brown sediment at the bottom of the basin. This is a truly rustic wool and I absolutely love it. I never mind picking twigs out of my yarn as I work. I have no idea why I am so drawn to natural wools and tweeds like this. Yum.


You can see the button choices here. TC helped me place them on the owls. She loves helping me make choices about things like this. 

After much deliberation, I have to say that this is my favorite.... 


...the single owl and the tiny white button eyes and off-center to the left. It's just enough.  

I've already stitched these two button eyes on with some matching gray thread. I found the buttons in an old button tin that my dear friend gave me after her mom passed away many years ago. I think her mom, Bernice, was around 90 years old. What a treasured gift. The two buttons I picked are not an exact match and they are slightly yellowed around the edges. I imagine they are really quite old which I love. Antique buttons kind of go with this sweater.

I love these buttons even more now that my friend is gone. She was a huge bird lover, too. It will be a sweet reminder of her and it made me feel good to stitch these particular buttons to the owl. 


There is both back shaping and a little side shaping on Owls. You can see the back shaping clearly here. I have only done side shaping before so this was new to me. I kind of like it. Waist and back shaping are always optional if you want a looser fitting sweater. 

I'll give more details and information (like size, gauge, tips, needles used, etc.) on my final post about Owls in a day or two. I've heard from a lot of knitters planning to start their own Owls sweater. It is a good choice.


Also, I have received lots of questions about my blocking boards since the Citron blocking day post. Mine are the original Knitter's Block by Cocoknits (click here for her website). I love them and I have the largest size set. It comes with the carrying bag and the set includes blocking pins, as well. Check it out if you are interested.

best, susie